« Older: Google Polyline Encoding « Older
Newer: Xcode 6 Simulator Folders »Newer »
Horizontal Paging Scroll View with Varying Width in Storyboards
If you are using autolayout in your projects then scroll views can initially appear to cause an issue. The trick to solving this is that if the size of the scroll view is tightly constrained and the size of the contents of the scroll view is tightly constrained then autolayout will do the rest of the work for you. Historically it has been quite simple to make a horizontally paging scroll view because the width of the screen hasn’t changed so it’s unlikely that the width of your scroll view needed to change. This meant you could hard code the width of the scroll view content to be a multiple of the width of the scroll view. This is now changing so we need to be able to make these scroll views for varying width screens.
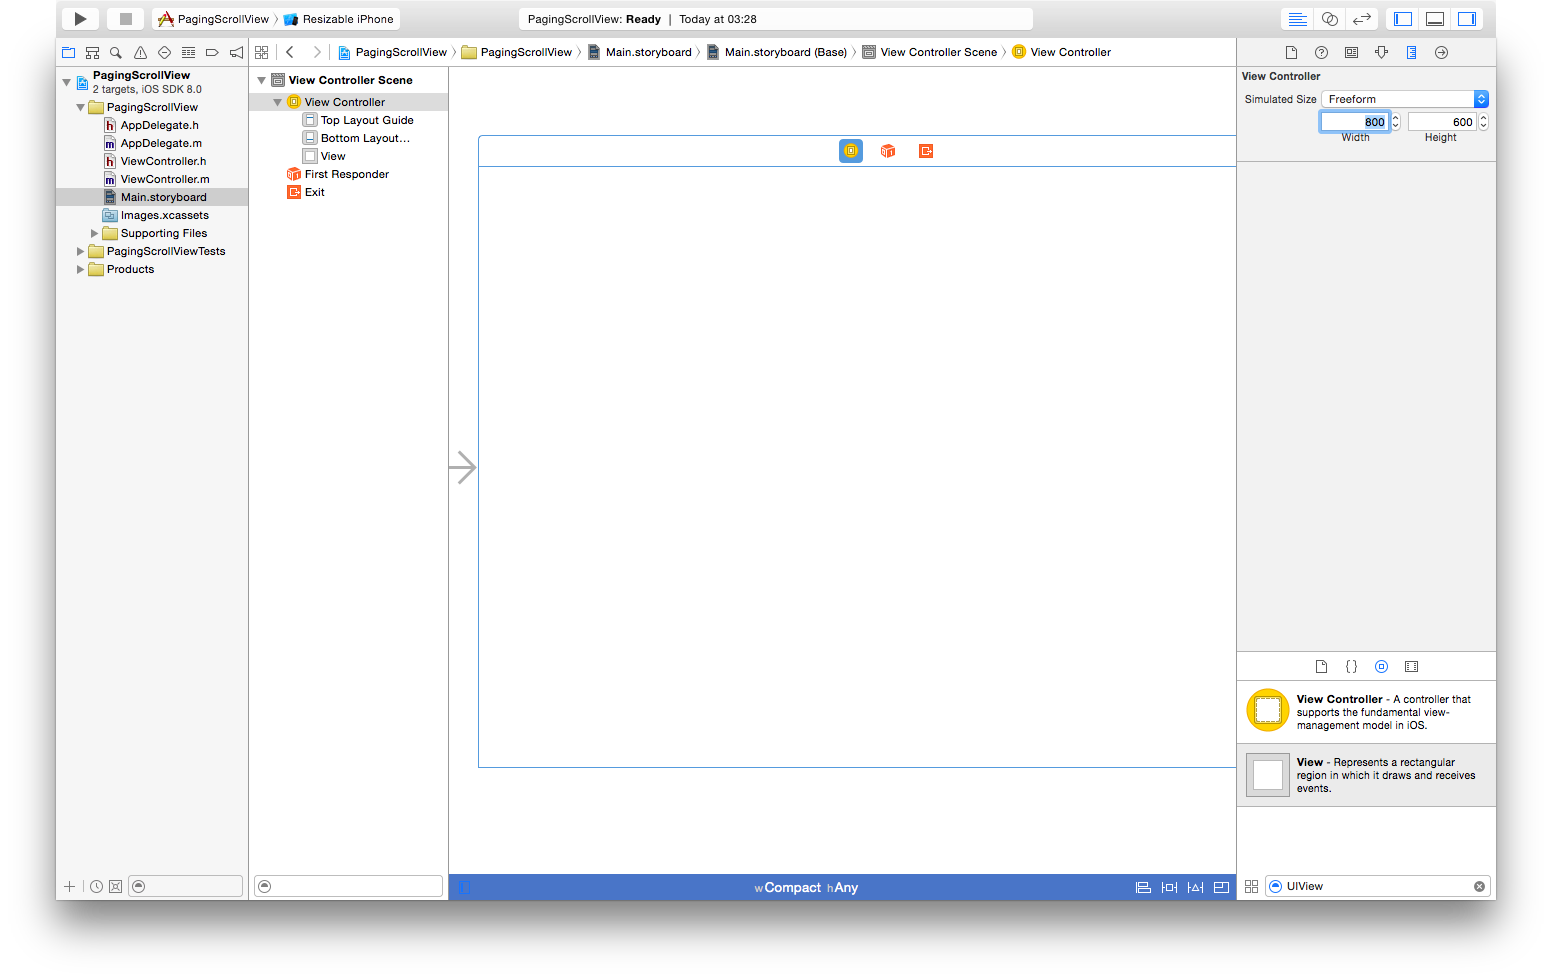
To layout the contents of a scroll view in iOS you need to (at least temporarily) make more room in your storyboard so you can fit the contents of the scroll view on screen. To do this select the view Controller that contains the scrollView, select the ruler symbol, and change the ‘Simulated Size’ from ‘fixed’ to ‘freeform’. Then adjust the width so you will have enough room to add all of the contents of your scrollView.
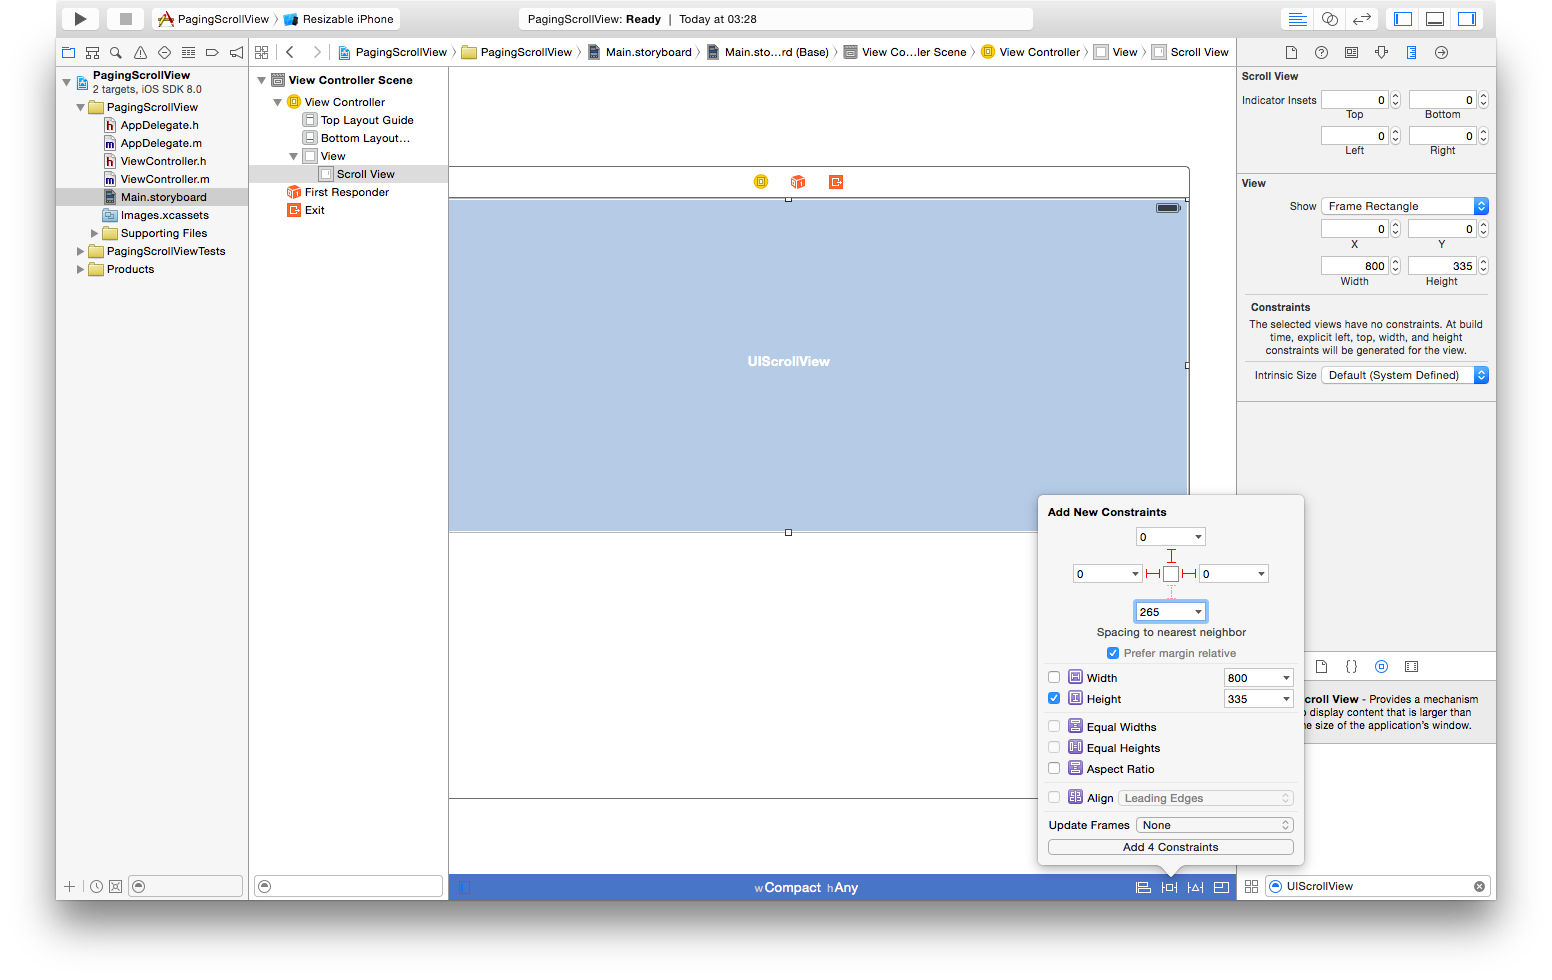
Next add your scrollView, and add the constraints to bind it to the correct position in the screen (this will normally be bound tightly to the sides of the screen, NOTE: you should turn off the ‘Constrain to Margins’ option (formally the Prefer margin relative) if you are going to bind to the edge).
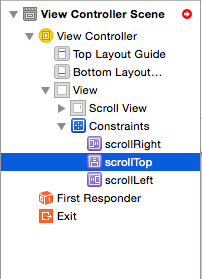
If you have a lot of constraints it can be useful to rename the constraints as later it makes it considerably easier to adjust the constraints later:
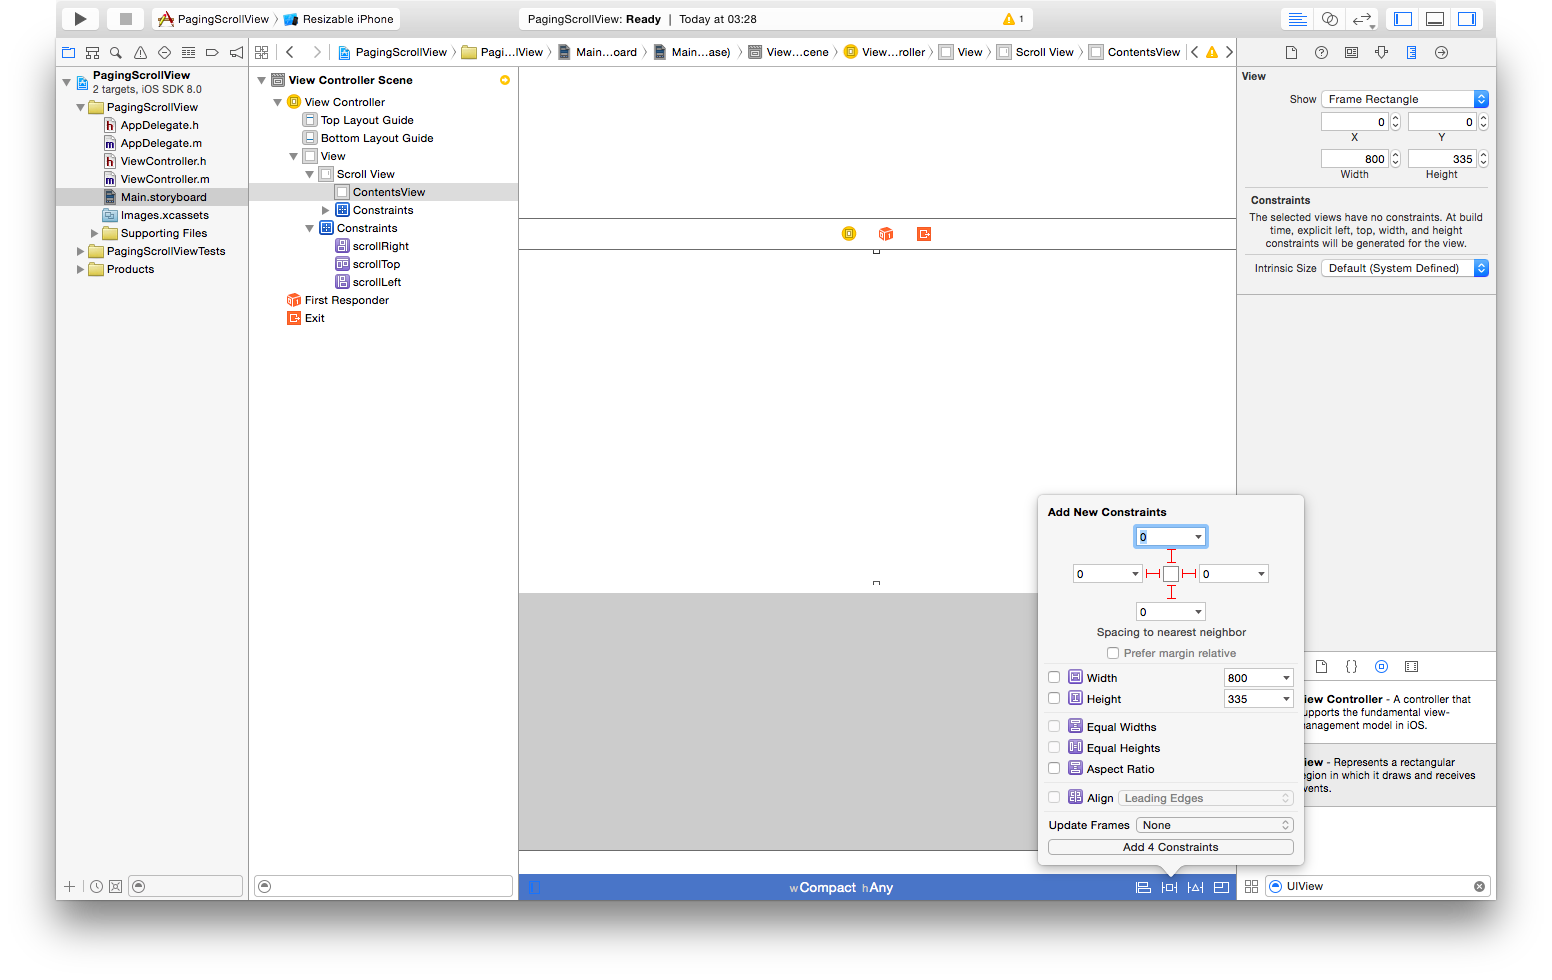
We’re now going to add a view to constrain the size of the contents of your scroll view. Select a UIView and add it to the inside of the scroll view so it entirely fills the inside of the scroll view. I’d recommend renaming the view so that its purpose is clear, I’ve renamed mine to ‘ContentView’. Renaming the views means that the constraints will have much more informative auto-generated names, and reduces the amount of renaming constraints that you need to do. Add constraints to your content view to bind it to the edge of your scrollView.
Now we’re going to make our content view have the correct width to make our scrollView scrollable. To do this we need to add width and height constraints. We need the width and height constraints to be relative to the width and height of the scroll view. To achieve this we start by adding constraints to make the content equal to the size of the scrollView. Right click on the constraint view add drag onto the scroll view, then select the ‘Equal Widths’ option. Then do the same for heights.
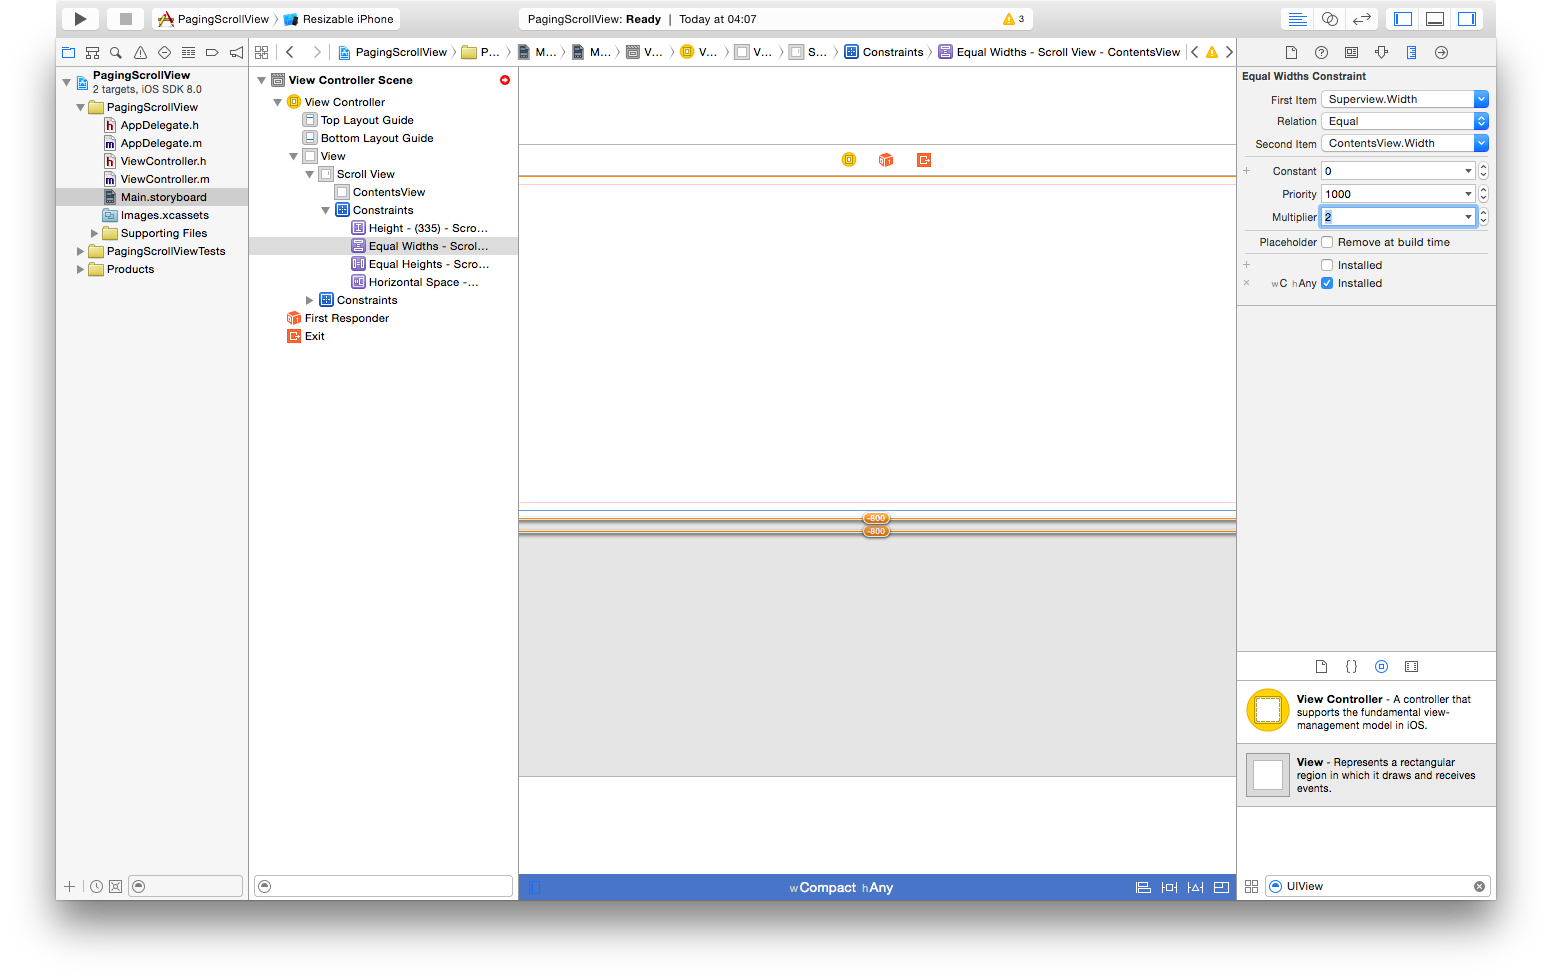
Instead of having the content equal in width to the scroll view we need it to be a multiple of the size of the scroll view, so we edit the equal width constraint that we created. Select the equal width constraint, then select the ruler icon in the right hand panel. In the top section make sure that the ‘First item’ is ‘contentsView.width and the ‘Second item’ is Superview.width. If the items are in the other order click the drop down menu on either item and select the ‘Reverse First and Second Item’ option. Change the multiplier option so that its value is the number of pages that you want in your scrollView. The storyboard will now warn you that the width of your content view doesn’t match your constraints. You don’t need to worry about this at the moment.
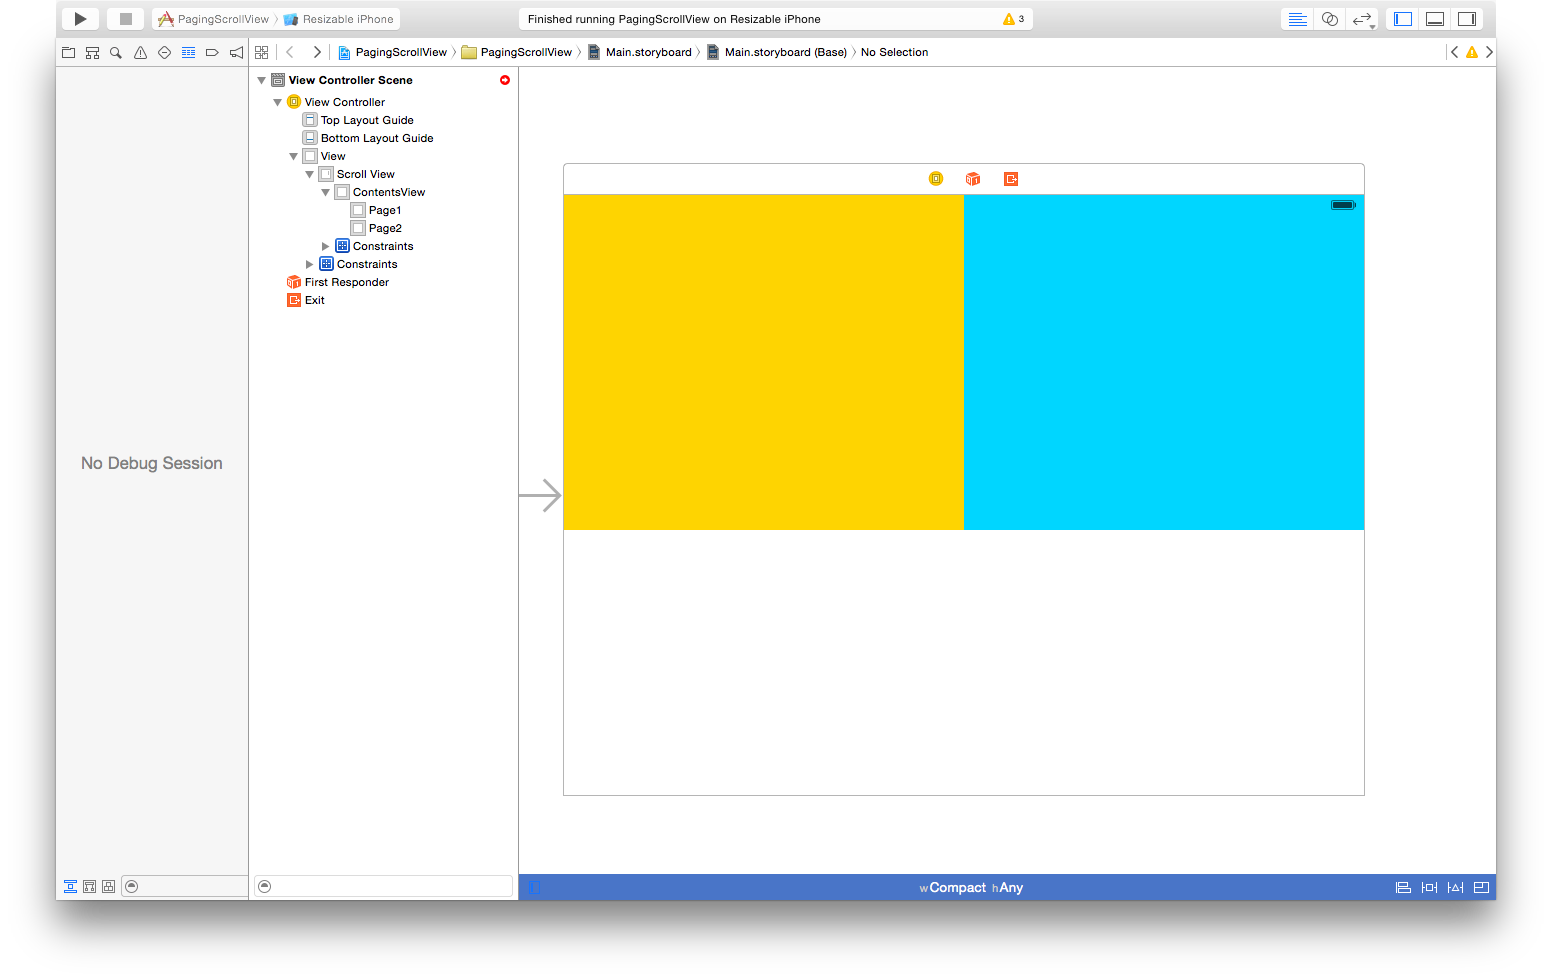
Next you can add views to be the background for your pages. To do this add a UIView for each page to the inside of the content view, with a width the same size as you want your scroll view to appear in the storyboard:
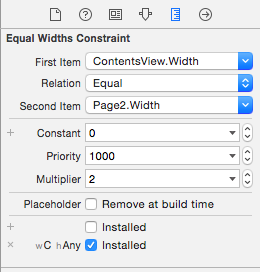
Now we want to add the constraints to the pages, in Xcode 5 you can make the page views an equal width to the scroll view. This doesn’t seem to work in the latest beta of Xcode 6 so instead you need to make the page views a proportional width of the content view. To do this make the page view the same width as the contentsView using the ‘Equal Width’ option as we did above. Then select the constraint and make sure that ContentsView.width is the top item. Once this is the case you can again set the multiplier to the number of pages that you want to make. This will constrains the page to the correct width.
Now you will need to add constraints for your pages so the pages are in the correct place in the view:
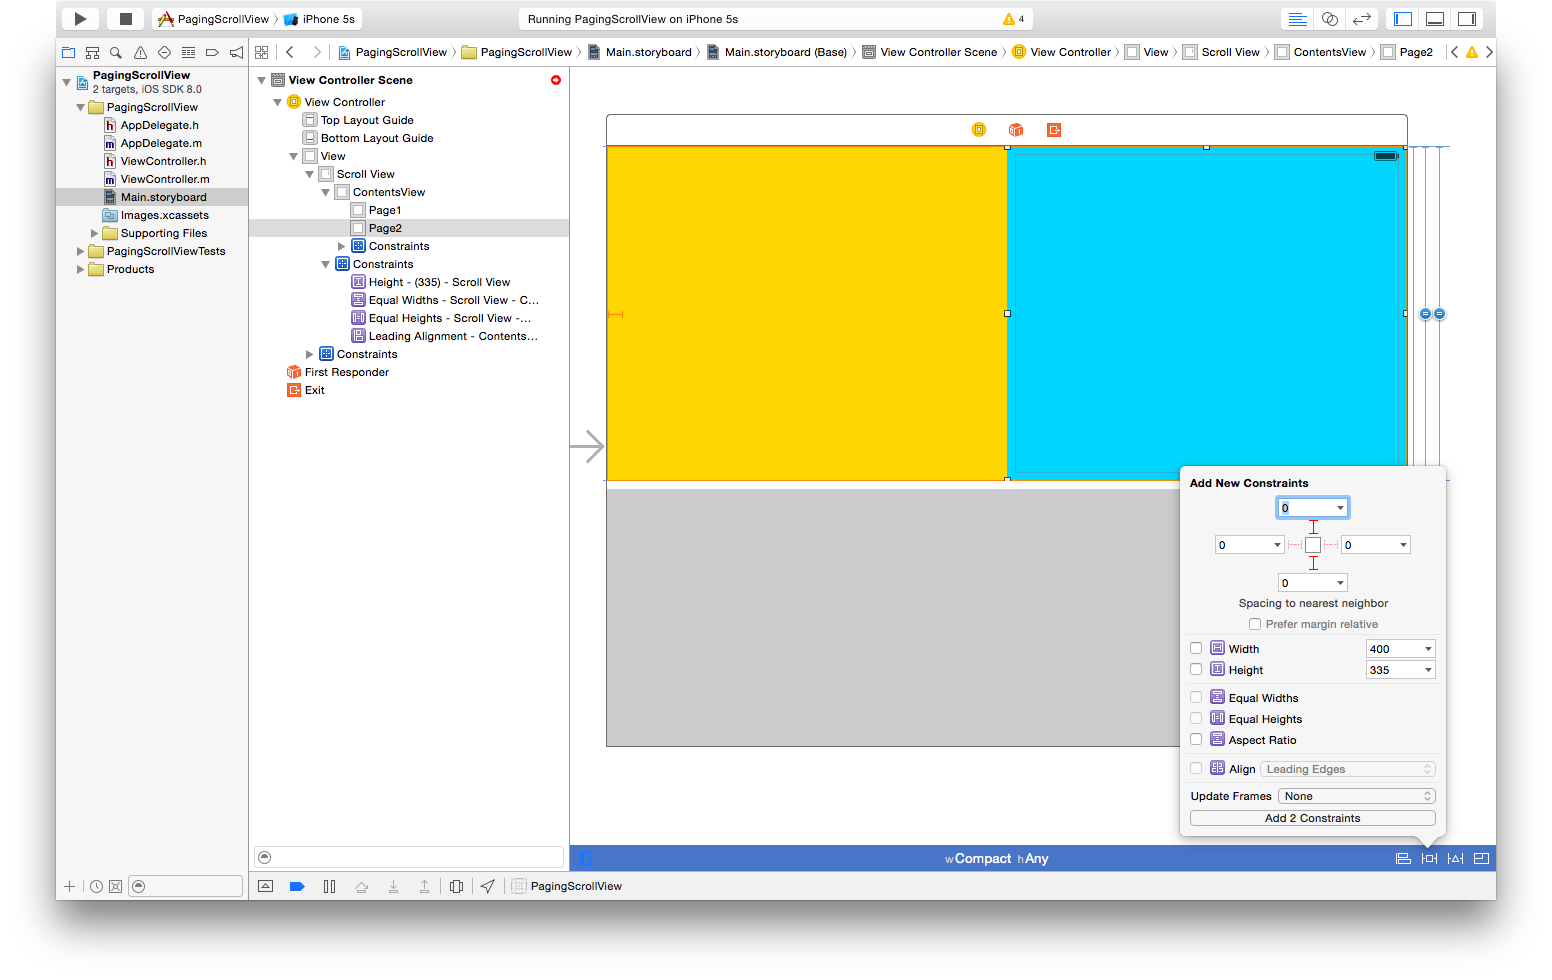

After this step you can layout your pages however you desire.
There will still be some warnings on your view controller. This is because the content view and the scroll view are the same size and the constraint says that the content view should be twice the size of the scroll view. To resolve this turn the ViewController back to a fixed size. After this look through any remaining warnings, it should simply be a matter of updating the frames of your views so that they match the constraints that you have added.
Here is a sample project with a resizable horizontal paging scroll view.